PADDING REMOVAL/REPLACEMENT
ON TAIL PLATE MACHINES
REMOVEL
OF REAR TAIL PLATE
1.
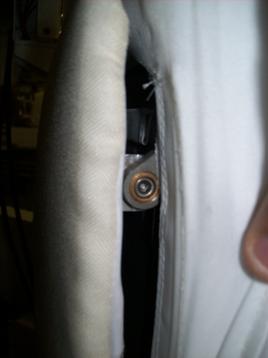
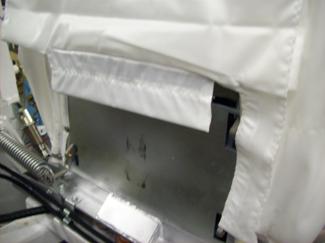
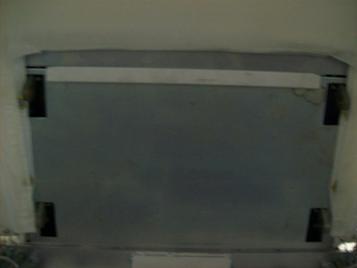
Remove the tail plate by removing the two screws on one side of the tail plate
that attach the plate
to the pivoting arms (links). A 3/16” Allen Wrench is required to remove these
screws (1/4-20 NC x ½” LG Socket Head Cap Screw). When taking out these screws be careful not
to lose the hardware and spacer. With the screws on one side removed, the tail
plate may now be removed from the body form and the cover/flannel replaced, if
required. To re-install tail plate, insert
one side into the links, align holes on opposite side with links and install
the hardware and spacer. Note, each connection requires a spacer and proper length screw. If spacer is missing, replace with new
spacer, p/n 43853-00.


![]()


![]()

![]()
REMOVAL/REPLACEMENT
OF BODY COVER/FLANNEL
1. Remove collar form from around collar clamp DO
NOT REMOVE COLLAR CLAMP.
2. Disconnect the springs at the
bottom of the cover/flannel.
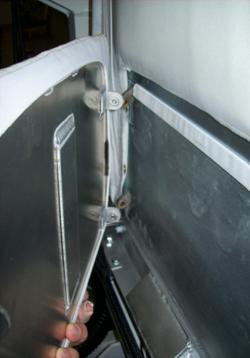
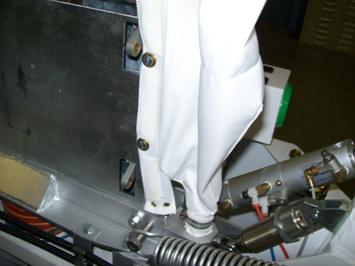
3. With the tail plate removed from
the body form, use a 5/32” Allen Wrench to remove the two button head screws(1/4-20 NC x ¾ ” LG Binding Head Socket Head Cap
Screw), that hold the retainer to the buck.
Be sure to use a wrench that is not worn (i.e. rounded hex) as this will
strip out the head of the screw.


![]()
![]()
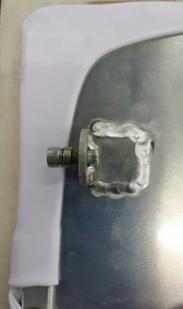
4. With the retaining plate removed,
lift the cover/flannel over the top of the body form and collar clamp.
5. Note the metal bar that is inserted
into a pocket on the old cover/flannel and remove this bar and insert into new
cover/flannel. This bar helps to keep the rear cover in place.

![]()
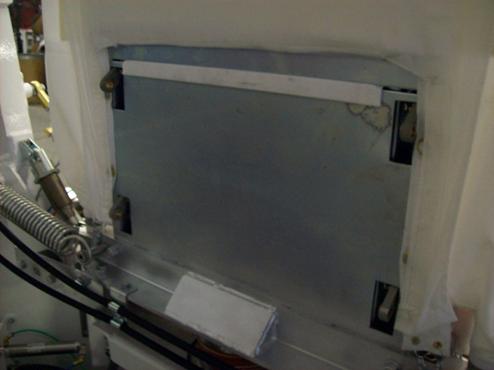
6. Install new outer cover and flannel
over body form and air bag cover. Pull down on flannel and outer cover to
eliminate bunching at the top of the body form. With the rear panel in place
and the bar inserted into the sewn in pocket, re-attach the retainer plate
removed in step 3, making sure that the cover fits behind the retaining plate,
and the bar inside the “pocket” is outside the buck shell and below the
retaining plate. Be sure that cover is
centered.
![]()

![]()

7. Install spring hooks into holes at the
bottom corners of flannel and outer cover. Route the springs around and under
air inlet block. Smooth out any wrinkles
on the front and back. Check that the open weave mesh at the top of the outer
cover is centered front to back and lying flat.
8. Install collar form onto collar
clamp.
REMOVAL AND REPLACEMENT OF SIDE AIR BAG
1. Remove Rear Tail Plate and
Cover/Flannel as described above.
2. Loosen the hose clamps at the base
of the air bag nozzles. Lift the air bag nozzles off the air pipes and remove
the Velcro straps from the hose clamps.
3. Remove four flat head screws
(1/4-20NC x ¾ LG Flat Head Screw) that attach the airbag to the buck.
![]()

4. Open the zipper in front (or rear
side) of air bag cover and remove air bag.
5. Install new air bag cover by
pulling cover around from the back. Center air bag cover on body form and air
bag nozzles over air inlet pipes. Attach air bag to rear of buck using the four
flat head screws removed in step 3.
These screws must be fully installed and be tightened so that they are
as flush as possible with the grommets on the airbag. Close zipper. Make sure
that the zipper pull is at the bottom of the zipper track and not in the
pressing area. Pull down on cover to remove wrinkles and make sure cover is
snug at top of body form. Check that the open weave mesh at the top of cover is
centered front to back. Install spring hooks into holes at the bottom corners of
the air bag. Route the springs around and under air inlet block.
5. Slide air bag nozzles over air
inlet pipes so that the air bag material is not twisted.
6. Remove new Velcro strips from new
air bag cover (stapled to cover) and wrap the
Velcro around the air bag nozzles. Tighten the hose clamps around the Velcro
strips and air bag nozzles.